Picture this: you open the cupboard under your sink and instead of a jumble of harsh-smelling bottles, you find simple glass jars filled with things you actually recognize—baking soda, vinegar, a sprig of real lavender. You can almost smell the difference already, right?
We’ve all felt that worry—the sting in your nose when you wipe down the counter or the guilt tossing another empty plastic bottle in the trash. Many store-bought cleaners promise magic, but leave behind chemicals nobody wants in their home, especially with kids or pets around. Worth asking: what are we really spraying all over the kitchen and bathroom?
Stick with me and you’ll walk away ready to create your own natural cleaning products DIY style—real recipes, nothing fancy, just practical swaps that work. Your home (and wallet) will thank you. Ready to see what’s really possible? Dive in.
Why Switch To Natural Cleaning Methods
Ever wondered why so many people are ditching traditional cleaners for natural alternatives? The truth is, conventional cleaning products often pack chemical ingredients that aren’t just harsh on surfaces—they can irritate skin, linger in your air, and even trigger asthma or headaches. According to the Environmental Working Group, over half of U.S. cleaning products contain ingredients linked to health risks, yet most households never think twice about them.
Switching to natural cleaning methods means choosing ingredients you know: baking soda, vinegar, lemon juice, pure castile soap. These are safe enough for food prep surfaces, gentle on your skin, and far less risky for the environment.
💡 Pro Tip: Always check for products labeled “fragrance-free” or “plant-based” if you do buy commercial formulas—hidden scents and dyes are major culprits for allergies and indoor air pollution, as highlighted by the American Lung Association.
- Cost Savings: You’ll be surprised—once you start making your own cleaners from pantry staples, your household budget thanks you. No more buying multiple specialty sprays for every room.
- Eco-Friendly: Natural products break down quickly and don’t introduce microplastics, harsh surfactants, or volatile organic compounds (VOCs) into the water supply.
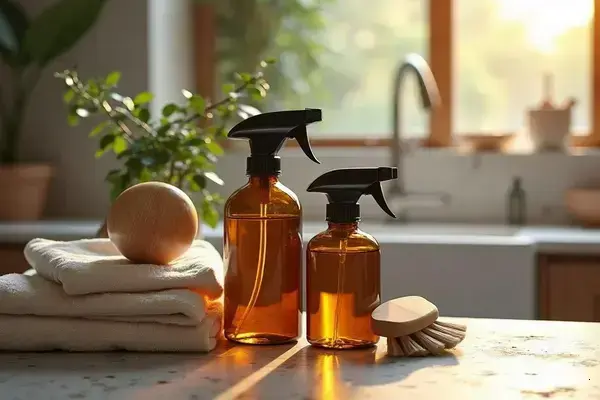
- Less Packaging Waste: DIY solutions mean reusable glass spray bottles—not piles of single-use plastic under the sink.
In practice: Imagine you’re cleaning your kitchen after dinner. You spritz a store-bought spray and instantly cough from the strong scent. The next night, you try a homemade mix of vinegar, water, and lemon. No cough, just a fresh clean. It’s that real.
| Traditional Cleaner | Natural Method | Key Difference |
|---|---|---|
| Chlorine bleach spray | Vinegar & baking soda | No toxic fumes, biodegradable |
| Scented multipurpose cleaner | Lemon & water mix | No synthetic fragrance, food-safe |
| Glass cleaner with ammonia | White vinegar & water | Streak-free, non-irritant |
The Centers for Disease Control and Prevention recommends using EPA Safer Choice-certified cleaners when possible, especially in homes with kids or pets. And honestly? Once you experience the peace of mind and fresh air, there’s no going back.
But there’s one detail most owners completely overlook until it’s too late…
Essential Ingredients For Effective DIY Cleaners
What do you actually need to whip up safe, effective DIY cleaners at home? It’s simpler than you think—no secret lab required. Most powerful natural cleaning starts with just a handful of approachable pantry staples, each tackling a specific mess, odor, or stain. You don’t need armfuls of fancy powders or a chemistry degree to make your home sparkle.
- Baking Soda (Sodium Bicarbonate): This versatile powder scrubs away grime, deodorizes, and neutralizes acids. According to the Environmental Protection Agency (EPA), it’s safe for nearly every surface in the house.
- White Vinegar (Acetic Acid): A natural degreaser and disinfectant for glass, tiles, and even microwaves. Safe, affordable, and easy to find—though you’ll want to avoid it on natural stone.
- Castile Soap: A gentle, plant-based all-purpose soap (Dr. Bronner’s is a classic brand), excellent for lifting dirt, grease, and kid messes without harsh additives.
- Lemon Juice: Cuts through tough stains, removes mineral build-up, and adds a fresh scent. Plus—it’s naturally acidic for even more cleaning punch.
- Hydrogen Peroxide (3%): Useful for whitening grout, removing mold, and sanitizing surfaces. The Centers for Disease Control and Prevention (CDC) lists it as a reliable disinfectant for non-porous surfaces.
- Essential Oils: Tea tree, lavender, and eucalyptus oil add natural antibacterial properties and a clean, pleasing aroma to your mixes. Always use them with care—just a few drops at a time.
💡 Pro Tip: When using essential oils, pick glass spray bottles for storage. Citrus oils, in particular, can degrade plastics over time—something the American Cleaning Institute also warns against.
Picture this scenario: It’s Saturday and you’re facing a bathroom mirror speckled with toothpaste. Instead of reaching for a harsh commercial spray, you mix two tablespoons of vinegar, a splash of liquid castile soap, and a squeeze of lemon in a glass bottle. It cuts straight through the mess—no foggy residue, no eye-watering fumes, and it actually smells inviting.
| Ingredient | Primary Function | Best Use Case |
|---|---|---|
| Baking Soda | Abrasive, deodorizer | Scrubbing sinks & odor removal |
| White Vinegar | Degreaser, disinfectant | Glass, tiles, appliance cleaning |
| Castile Soap | Multipurpose gentle cleanser | All-purpose cleaner base |
| Lemon Juice | Natural acidic stain remover | Cutting boards, faucets |
| Hydrogen Peroxide | Sanitizer, whitener | Grout, mold, bathroom surfaces |
| Essential Oils | Scent, antibacterial | Finishing touch for fresh aroma |
What actually works might surprise you…
Step-By-Step Recipes For Everyday Cleaning
You want a sparkling home—without worrying about what weird chemicals are clinging to your countertops, glass, and sinks. So what’s the real process for mixing up DIY cleaning formulas that genuinely work—and won’t waste your time (or money)? Get your basics ready first, then follow the steps for remarkable results with minimal effort.
- Baking soda
- White vinegar
- Castile soap
- Lemon juice
- Hydrogen peroxide (3%)
- Essential oils (optional: tea tree, lavender, lemon)
- Glass spray bottles
- Microfiber or cotton cloths
- All-Purpose Surface Spray: Mix 1 cup water, ½ cup white vinegar, and 1 teaspoon castile soap in a spray bottle. Add 10 drops essential oil for scent, if desired.
- Glass & Mirror Cleaner: Combine 1 cup water with ¼ cup vinegar and 2 tablespoons lemon juice. Shake and spray for sparkling, streak-free results.
- Scrubbing Paste: Stir ½ cup baking soda with a few tablespoons water until you get a paste. Use it on sinks, tubs, and stovetops. Rinse well.
- Disinfectant Solution: Mix equal parts hydrogen peroxide and water in a dark glass bottle. Spray on bathroom and kitchen surfaces. Let sit for 5 minutes, then wipe dry.
- Deodorizing Carpet Sprinkle: In a jar, combine 1 cup baking soda with 15 drops lavender oil. Shake well, sprinkle on carpets, wait 10 minutes, then vacuum.
⚠️ Important Warning: Never mix hydrogen peroxide with vinegar or any acidic ingredient in the same container—it can create irritating fumes. The American Cleaning Institute recommends separate application when using both.
In practice: Picture this scenario—your little one just left muddy shoe prints across the kitchen tile. Instead of grabbing a shop-bought chemical, you spray your homemade all-purpose solution, wipe once, and watch the mess vanish. No strange smell, and your hands aren’t dry or itchy afterwards.
| Recipe | Application | Time Needed |
|---|---|---|
| All-Purpose Spray | Counters, fridge, high-touch spots | 2 mins |
| Glass Cleaner | Windows, mirrors | 1 min |
| Scrubbing Paste | Sinks, tubs, stove | 5 mins |
| Disinfectant Solution | Bath, handles, toys | 5-10 mins sit time |
| Carpet Deodorizer | Rugs, mats | 10 mins + vacuum |
And this is exactly where most people make the most common mistake…
Spot-Testing And Safety Tips You Can Trust
Ever worried about damaging a favorite countertop or heirloom fabric with a homemade cleaner? Here’s the thing—not all surfaces react the same way to natural cleaning solutions, even ones made from gentle ingredients. That’s why spot-testing isn’t just a box to check, it’s the secret to protecting your home and peace of mind.
How To Spot-Test A DIY Cleaner
- Find an out-of-sight location (back corner, underside, or hidden spot on your target surface).
- Apply a small amount of your cleaner using a clean cotton swab or soft cloth.
- Let it sit for at least 10 minutes—don’t rush this step.
- Wipe away gently and check for any color change, dulling, or residue.
- If safe, proceed to clean the whole area. If not, try a milder recipe.
💡 Pro Tip: Always avoid using acidic cleaners (like vinegar or lemon juice) on natural stone, marble, or grout. According to the National Association of Home Builders, acids can etch and permanently damage porous surfaces.
- Check Product Expiry: Even natural ingredients like hydrogen peroxide lose potency after opening. Replace every 6 months for best results.
- Label Everything: Write the recipe and date directly on your spray bottle (a simple sticker works wonders for busy homes).
- Keep Away From Kids & Pets: Essential oils smell amazing, but they aren’t safe to ingest or get in the eyes—store bottles well out of reach.
- Ventilate: Some natural mixes still release strong scents or harmless vapors. Open a window during use for fresher air and faster drying.
In practice: imagine you just mixed your own scrubbing paste and want to tackle a bathroom countertop. Instead of diving in, you dab a bit behind the faucet and wait. No mark, no haze—you’re in the clear and can scrub with confidence.
| Surface | Safe With | Avoid |
|---|---|---|
| Quartz | Baking soda, castile soap | Vinegar, lemon |
| Marble/Granite | Mild soap, water | Any acid, baking soda |
| Stainless Steel | Vinegar, baking soda | Chlorine, undiluted hydrogen peroxide |
| Natural Wood | Mild soap, diluted vinegar | Excess water, pure lemon |
The Environmental Protection Agency (EPA) highlights the importance of safe DIY labeling, proper ventilation, and correct ingredient use for all homemade cleaning projects. What actually works might surprise you…
How To Store And Use Your DIY Cleaning Products
Ever mixed up a killer batch of homemade cleaner, only to open it two weeks later and—yikes—it smells weird or looks cloudy? The truth is, proper storage isn’t just a nice extra; it’s what makes your DIY solutions safe, long-lasting, and worth your effort. If your cleaner fizzles out before you use it, you’re losing both time and money.
- Choose Glass Over Plastic: Certain ingredients (like essential oils and vinegar) can react with plastics, weakening the bottle and your cleaner. The American Cleaning Institute recommends using amber or cobalt glass bottles to block UV and keep formulas potent longer.
- Label Clearly: Write the mix date, ingredients, and best-by on each bottle. A simple peel-and-stick label or a grease pencil works well even in steamy bathrooms.
- Store Away From Heat & Sunlight: Place bottles in a cool, dark cabinet—kitchen pantries are perfect. This prevents ingredient breakdown, weird smells, and reduced cleaning power.
💡 Pro Tip: Never store hydrogen peroxide solutions in clear glass or open containers. It breaks down fast in light. Opt for dark glass and finish within 30 days to keep disinfecting strength intact.
| Type | Best Container | Shelf Life |
|---|---|---|
| Vinegar-Based Cleaner | Amber glass spray bottle | 2 months |
| Hydrogen Peroxide Mix | Opaque/dark glass bottle | Up to 1 month |
| Scrubbing Paste (baking soda) | Glass jar with tight lid | 6 months |
In practice: let’s say you make a full 32 ounces of all-purpose spray—one for the kitchen, one for the bathroom. Stored in labeled amber bottles on your pantry’s middle shelf, they work just as well on day 40 as on day 1. No waste, no guessing, just grab and go when you need them most.
- Shake Before Use: Ingredients do settle, especially in natural mixes that skip binders and stabilizers. Quick shake, and you’re ready.
- Spot-Test Old Mixes: If a bottle’s been sitting a while, do a quick smell and dab on a hidden spot. Any strange scent or residue? Toss it and make fresh.
- Keep Out of Reach: Homemade doesn’t always mean harmless. Always keep cleaning solutions away from little hands and paws—even the gentlest formulas can upset tummies.
The right habits in place now make everything easier from here.
Your Cleanest Home Begins Here
If you take just one thing from this guide, let it be: using simple, trusted ingredients and a little know-how, you can make natural cleaning products DIY solutions that truly work. You know what to buy, how to mix, how to test for safety, and how to keep everything fresh for the long haul. That’s the winning formula—no mystery, no hassle.
Think back to before you started—confused by labels, worried about hidden chemicals, maybe overwhelmed by all the options at the store. Now, you’ve got confidence. You can tackle any mess with homemade cleaners, save money, and keep your family safe. It feels good to take control, right?
What’s the first spot in your home you can’t wait to try your own natural cleaner on? Share your before-and-after stories in the comments—we can’t wait to hear what works for you!