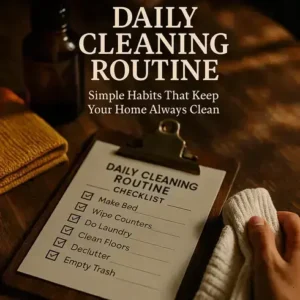
Saturday morning. You swing open the closet and get hit by a stack of mystery lids, dusty boots, and good intentions — everywhere. Now imagine having a spring cleaning checklist printable that tells you exactly what to do, in what order, and how long it’ll take.
The real headache isn’t dust — it’s decision fatigue. You bounce between rooms, lose time hunting supplies, and by Sunday night the house looks half-done and you’re wiped. That mess steals your weekend, your focus, and, honestly, your mood.
Here’s the plan: a room-by-room weekend roadmap, time blocks that actually work, and a printable you can tape to the fridge. By the end, you’ll follow a spring cleaning checklist printable, hit every high-impact task, and finish fast without cutting corners. Ready to map your 48-hour game plan?
The 48-Hour Plan: Prep, Zones, And Timing
What makes a weekend plan actually work? Clear zones, strict timeboxing, and tiny buffers you protect like gold — that’s the engine. The truth is: when you assign blocks to rooms and lock the order, you kill decision fatigue and stop scope creep before it starts.
In practice: picture a two-bedroom apartment. You run 90-minute blocks with 15-minute resets, finish kitchens before noon, and park laundry on a continuous loop. By Sunday at 5 p.m., the house looks new and you’re not wrecked — because the schedule, not willpower, carried you.
- Prerequisites: declutter hotspots for 20 minutes Friday.
- Gear: HEPA vacuum, microfiber cloths, List N disinfectant, caddy.
- Timers: 90-minute work, 15-minute reset, 5-minute sprint.
- Zones: Kitchen → Bathrooms → Bedrooms → Living → Entry.
💡 Pro Tip: Follow disinfectant “dwell time” on the label — CDC and EPA note surface contact time is required for effectiveness. Wipe too soon and you lose kill claims.
| Block | Primary Zones | Focus/Notes |
|---|---|---|
| Sat AM | Kitchen + Pantry | Degrease, fridge purge, floors |
| Sat PM | Bathrooms | Descale, grout, glass, vents |
| Sun AM | Bedrooms | Linen cycle, dust, under-bed |
| Sun PM | Living + Entry | Upholstery, baseboards, filters |
Worth noting: “timeboxing” isn’t speed cleaning — it’s a limit that preserves energy. Use a caddy so every transition is one trip, not five.
- Stage supplies Friday night and pre-sort laundry by load.
- Start each block with trash, then surfaces, then floors.
- Batch like tasks (all mirrors, all vents) for momentum.
- Run linens and rugs on a continuous cycle between zones.
- Protect one 45-minute buffer Sunday for surprises.
Picture this scenario: you hit a soap-scum wall at 70 minutes. Instead of spiraling, you park it, mark “return,” and switch to dusting — momentum saved, schedule intact.
If you have asthma or chemical sensitivities, check products and methods with your clinician before use.
But there’s one detail most people overlook until it’s too late — how to sequence micro-tasks inside each room for the biggest payoff…
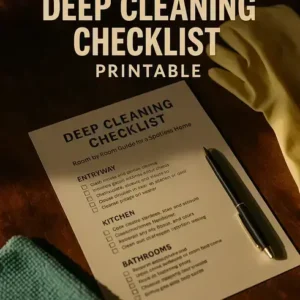
Room-By-Room Deep Clean: Kitchen, Bathrooms, Bedrooms, Living Areas
Which tasks move the needle fastest? Target grease, biofilm, and dust reservoirs — the spots that hold odors and allergens. Here’s the thing: when you clean by room and by soil type, results stack fast.
Picture this scenario: you open the fridge and find sticky shelves, limp herbs, and a mystery jar. Twenty minutes later, it’s purged, wiped, and re-zoned — fewer trips to the store, less waste.
Kitchen
- Degrease the range hood, backsplash, and cabinet pulls; heat the oven to “warm” first to soften buildup.
- Sanitize the sink and disposal; NSF International identifies kitchen sinks and sponges as top germ hotspots.
- Purge the fridge; wipe rails and bins; label zones (produce, proteins, grab-and-go).
- Run a dishwasher cleaning cycle with descaler; clean the filter and spray arms.
- Finish with floors: vacuum edges, then damp-mop with a neutral-pH cleaner safe for sealed wood or tile.
Bathrooms
- Pre-treat shower walls and glass with a mild acid descaler (for calcium/soap scum).
- Scrub grout lines with an alkaline cleaner first (cuts body oils), then rinse.
- Detail fixtures and drains; use a soft brush around bases and hinges.
- Disinfect high-touch points: faucets, flush levers, cabinet pulls.
- Launder or replace shower curtain liner; squeegee glass to prevent spots.
- Vacuum and wash exhaust fan covers; dust the vent housing.
💡 Pro Tip: Ventilate before, during, and after cleaning — the EPA notes that increasing fresh air reduces exposure to volatile compounds from cleaners. Crack a window and run the exhaust fan for 10–15 minutes.
Bedrooms
Allergens hide in textiles. AAFA highlights dust mites as a common trigger; CDC notes washing bedding in hot water (130°F/54°C) helps control them.
- Strip beds; wash sheets and pillowcases hot; dry fully.
- Vacuum mattress surfaces with a HEPA tool; rotate or flip if recommended.
- Encase pillows and mattresses with protectors for long-term allergy relief.
- Damp-dust headboards, nightstands, and baseboards; empty and reset drawers.
Living Areas
- Vacuum upholstery and under cushions; spot-clean with fabric-safe solution.
- Disinfect remotes, game controllers, and light switches.
- Dust vents and change the HVAC filter (MERV 11–13 helps capture fine particles).
- Edge-vacuum baseboards; mop or clean carpets per manufacturer guidance.
In practice: a single HEPA pass along sofa creases pulls out a shocking amount of grit — which is why colors look richer and fabrics last longer.
And this is exactly where most people make the most common mistake — they skip the small, high-yield details that transform the whole house…
High-Impact Tasks Most People Skip
Want the biggest payoff with the least time? Hit the hidden grime that drives odors, allergies, and energy waste — the spots almost everyone skips.
Here’s the thing: these tasks look minor, but they punch above their weight. Clean them once per season and the whole house feels fresher and runs cheaper.
| Location | Skipped Task | Why It Pays Off |
|---|---|---|
| Laundry Room | Clear dryer vent duct and lint trap housing | NFPA reports clothes dryer fires each year; lint also reduces airflow and dries slower. |
| Kitchen | Vacuum refrigerator condenser coils | ENERGY STAR notes dirty coils can raise energy use significantly; cooler compressor = longer appliance life. |
| HVAC & Fans | Dust ceiling fan tops; vacuum return grills; upgrade filter | American Lung Association links cleaner indoor air to fewer irritants; MERV 11–13 helps capture finer particles. |
| Bathroom | Flush sink overflow and scrub shower door tracks | EPA emphasizes moisture control to prevent mold; this reduces biofilm and musty smells. |
| Living Areas | Wash throw pillow covers; vacuum under sofas with crevice tool | AAFA cites textiles as dust mite sources; quick textile refresh cuts allergens fast. |
💡 Pro Tip: Unplug the fridge before coil cleaning and pull it out slowly — use a soft brush plus a vacuum with a crevice tool to avoid fin damage.
In practice: you spend 15 minutes on the dryer vent and 10 on fridge coils. Next load dries in 40 minutes, not 65 — and the fridge runs quieter and cooler.
- Set a 45-minute block and gather gear: coil brush, crevice tool, microfiber, dish soap, old toothbrush, bucket.
- Start with the dryer vent: remove lint screen, vacuum housing, then brush the duct from both ends if possible.
- Unplug and move the fridge; brush coils top-to-bottom; wipe the floor before sliding back.
- Pop bathroom sink stopper; flush the overflow with hot water and a bit of dish soap; scrub door tracks.
- Dust fan tops with a damp cloth; swap in a MERV 11–13 filter; wash pillow covers on hot if fabric allows.
Picture this scenario: guests arrive and the house smells “new,” yet you didn’t deep-clean every inch — you just fixed the five highest-impact zones.
What actually works might surprise you — the next move is about speed systems that make every room flip faster…
Speed Tricks And Shortcuts For Busy Weekends
Short weekend? You need leverage — tactics that shrink scrubbing, bundle motions, and cut walking. Here’s the thing: speed isn’t rushing; it’s removing friction before you start.
In practice: you’ve got 45 minutes before guests. You pre-soak the worst zones, vacuum edges first, then center paths, and finish glass with a clean S-pattern. The place pops, and you didn’t sprint.
| Shortcut | Best Use | Typical Time Saved |
|---|---|---|
| Pre-Soak, Then Wipe | Oven doors, shower walls, greasy backsplashes | Often 5–10 min per room |
| Two-Towel Microfiber (damp + dry) | Stainless, counters, faucets — chase-dry for shine | Fewer passes; streaks avoided |
| Squeegee Glass In S-Pattern | Mirrors, shower glass, interior windows | About 50% fewer wipes |
| Edge-First Vacuum Path | Living areas and halls; crumb lines at baseboards | 10–15 min on whole floor |
| Batch Like Tasks | All mirrors, then all vents, then all switches | Context switching nearly zero |
💡 Pro Tip: Use high-quality microfiber for surfaces and glass. ISSA notes microfiber lifts more soil than cotton, which means less chemical, fewer repeats, and faster shine.
The 12-Minute Reset Loop
- Gear: compact caddy, two microfiber towels, glass squeegee, cordless stick vacuum, small catch-all bin.
- Set a 12-minute timer. Park the caddy at the room entry for fast reloading.
- Trash and returns first: sweep visible clutter into the bin; drop items where they belong on your exit pass.
- Pre-spray the “worst three” (sink, cooktop, door prints) and let chemistry work while you move.
- Vacuum edges, then center lanes. One smooth path prevents double-tracking.
- Wipe surfaces with the damp towel; follow immediately with the dry towel on shine zones.
- Finish glass with an S-pattern and a quick baseboard swipe if time remains.
Worth noting: concentrates save steps. Pre-dilute one all-purpose and one glass bottle — labels on, ready to go — so you aren’t mixing mid-clean.
What actually works might surprise you — the real accelerator is a printable flow that keeps everyone in the house following the same steps, in the same order…
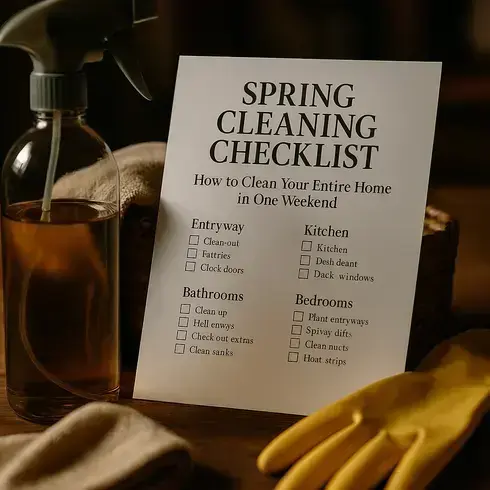
Printable Spring Cleaning Checklist To Use And Share
Wish everyone could clean in sync without questions? A single printable makes it obvious — what to do first, how long it takes, and when you’re done.
In practice: you tape the checklist to the fridge Friday night. By noon Saturday, your partner’s on bathrooms, you’re in the kitchen, and teens are running the laundry loop — zero “what now?” interruptions.
- What’s inside: 48-hour timeline with start/finish blocks and a small buffer.
- Room-by-room checkboxes with “worst three” prompts and dwell-time reminders.
- Seasonal high-impact tasks (coils, vents, dryer duct) slotted for Sunday PM.
- Laundry loop tracker: loads, cycles, and where items return.
- Supply caddy inventory with refill notes.
- Owner column, time estimate, and a final walk-through mini-check.
💡 Pro Tip: Print on 8.5×11 cardstock, then slide into a page protector or laminate. Use dry-erase markers to reassign tasks. American Cleaning Institute recommends following product labels for dilution and contact time — include that note on your sheet.
| Format | Best For | Setup Tips |
|---|---|---|
| Standard Print | Quick weekend runs; guests coming | Use cardstock + magnet clip on fridge |
| Laminated Reusable | Families, roommates, small teams | Dry-erase pens; color-code by person |
| Fillable PDF | Sharing with partners/cleaners remotely | Save weekly copies; track time spent |
How To Use And Share It
- Gear: printer, cardstock or lamination sleeve, dry-erase marker, magnet clip or clipboard, highlighter, kitchen timer.
- Block 10 minutes Friday to assign owners and estimates. Circle the hardest zones first.
- Pre-stage supplies and write “start times” for each block. Add one 45-minute buffer.
- During each block, check tasks as you go and record actual minutes spent.
- Pause for dwell times (disinfectants need it); CDC guidance supports contact time for effectiveness.
- After each room, snap a quick photo and mark “done” — simple proof of progress.
- On Sunday evening, review time spent, note bottlenecks, and save the sheet for next season.
Who benefits most? Busy families, roommates juggling shifts, hosts prepping fast, and anyone managing cleaners. Update it every quarter, keep it visible, and tweak categories to match pets, kids, or home size. Once this is in place, the rest of the routine falls into place naturally.
Your Weekend Clean, Simplified
The big three: a strict 48-hour plan with zones and timeboxes, room-by-room sequencing that targets grease, biofilm, and dust, and one shared spring cleaning checklist printable to keep everyone aligned. If you take just one thing from this guide, let it be: lock your 48-hour timeboxes and follow the printable — order beats effort every time.
Before, weekends felt chaotic — bouncing between rooms, losing steam, finishing half the house. Now you’ve got a clear flow, high-impact tasks scheduled, and speed tactics that slash repeats. Air feels fresher. Surfaces shine. You’ll finish by Sunday and still have energy left. That’s the goal — done, not drained.
Which room are you tackling first — kitchen, bathroom, bedrooms, or living areas — and do you prefer the laminated or fillable version of the checklist? Tell us in the comments!

About the Author:
Claire Anne Foster is a home organization enthusiast, lifestyle writer, and the founder of this blog — built for people who want a cleaner, calmer home without spending every weekend doing it.
After years of testing every organization system, planner, and cleaning routine she could find, Claire realized that most advice was either too complicated to maintain or too generic to be useful. So she started creating her own — simple, printable, and designed for real life with real schedules.
Claire is not a professional organizer or interior designer — just someone who genuinely loves a well-organized home and believes that the right checklist or routine can change how your entire week feels. Every resource on this site is practical, tested, and designed to be used — not just pinned and forgotten.
When she’s not writing or reorganizing her pantry for the third time, Claire is testing new meal planning systems, exploring better morning routines, and convincing her family that yes, everything does need a labeled bin.