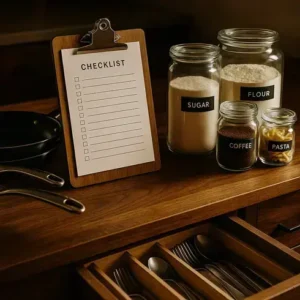
Ever open your pantry and watch a bag of flour slide, spices topple, and dinner plans stall? Picture the opposite—calm shelves, clear bins, and a simple pantry organization checklist printable on the door.
The mess isn’t just visual. You re-buy pasta you already own, waste food past dates, and lose weeknight minutes you don’t have. That low-grade clutter hums in the background—costing money, meals, and a bit of your sanity.
By the end, you’ll have clear zones, the right containers, fast labeling, and a working pantry organization checklist printable you can stick to. Ten-minute resets, fewer duplicates, meals that start on time. Ready? We’ll start by sizing up what you own.
Audit Your Pantry And Define Zones That Match Real Life
Your pantry doesn’t fail because you lack bins—it fails because it doesn’t match how your household actually eats. Start with an audit, not shopping. Fifteen focused minutes now saves you hours every month.
Wondering how to map zones that actually stick? Use three filters: frequency (grab-daily items up front), adjacency (group meal components together), and safety (heavy or glass low, kid snacks mid-height). According to USDA FoodKeeper and FDA food labeling guidance, rotate stock using FIFO—first in, first out—and separate allergens to reduce accidental mix-ups.
💡 Pro Tip: As you sort, add a date dot to every opened package. “Use-by” dates relate to safety; “best-by” dates relate to quality—keep the oldest in front for easy grabs.
Quick Audit And Zoning Steps
Time: 45–60 minutes for a standard four-shelf pantry.
- Supplies: timer, sticky notes, marker, trash bag, donation box, clipboard printable, tape measure.
- Empty one shelf at a time and group like-with-like on the counter: breakfast, dinner bases, snacks, baking, beverages, backstock.
- Check dates fast; toss spoiled, donate safe duplicates you won’t use this month, and combine partials where practical.
- Measure shelf depth/height—this prevents buying bins that don’t fit and helps you choose short vs. tall containers later.
- Map zones with sticky notes at shelf level based on frequency. Daily-use at eye level; weekly items higher; heavy/backstock lower.
- Apply FIFO during the re-load: oldest to the front, newest behind. Keep oils away from heat and light to preserve quality.
- Create a “quarantine” spot for opened or odd-size items so they don’t drift across shelves.
- Finalize with a quick count on your checklist: how many cereals, pastas, snacks, and sauces you actually maintain week-to-week.
Picture this scenario: a busy parent realizes breakfast hits happen five days a week, while baking is once a month. She moves oats, nut butter, and honey to eye level—and shifts cake mixes up. Mornings speed up because the shelf now mirrors life.
Sample Real-Life Zones
| Zone | Store Here | Why It Works |
|---|---|---|
| Breakfast | Cereal, oats, nut butter, shelf-stable milk | High-frequency items at eye level reduce morning friction |
| Dinner Base | Pasta, rice, canned tomatoes, beans | Adjacency speeds meal assembly and prevents duplicate buys |
| Snacks & Kids | Bars, crackers, fruit cups | Mid-shelf access fosters independence and portion control |
| Baking & Sweets | Flour, sugar, chips, cocoa | Lower frequency = higher shelf; protects space for dailies |
| Backstock & Bulk | Extras, heavy bottles | Low shelf placement increases safety and stability |
But there’s one detail most owners completely overlook until it’s too late—the label system that teaches everyone to maintain these zones…
Choose Containers, Lazy Susans, And Labels That Fit Your Space
Great containers don’t fix bad fit—your space does. Here’s the thing: choose by shelf depth, product type, and who’s grabbing what daily. Then the system sticks.
Materials matter. Borosilicate glass is inert and clear; PET or PP (#5) plastic is light and durable; metal baskets corral packaged goods fast. According to FDA guidance on food-contact materials and Consumer Reports testing, prioritize BPA-free plastics and avoid storing acidic foods in scratched containers.
💡 Pro Tip: Leave 1 inch of clearance in front of bins and 2 inches around turntables. Square footprints use shelf volume better than round canisters—save round for spices and small-batch items.
Smart Container Decisions
| Option | Best For | Watch-Outs |
|---|---|---|
| Borosilicate Glass Canisters | Flour, sugar, rice (airtight gasket) | Heavier; store low for safety |
| PET/PP Modular Bins | Cereal, snacks, pasta (stackable) | Replace if cloudy or cracked |
| Wire/Woven Baskets | Bagged snacks, pouches, backstock | Not for loose ingredients |
In practice: you’ve got 11-inch-deep shelves and tall vertical space. You pick 2.5–4 quart modular bins for cereal and pasta, glass for baking staples on the lowest shelf, and a 12-inch lazy Susan for oils. Dinner prep stops feeling like a scavenger hunt.
- Turntable sizing: 10″ for spices; 12″ for oils/condiments; 16–18″ for snack pouches. High-lip edges prevent tip-overs; ball-bearing bases spin smoother.
- Container seals: Look for silicone gaskets and a positive “click.” Airtight keeps cereal crisp and flour dry.
- Capacity cues: Flour 4–6 qt, sugar 3–4 qt, rice 4 qt, cereal 2.5–3 qt. Match to the package you buy most.
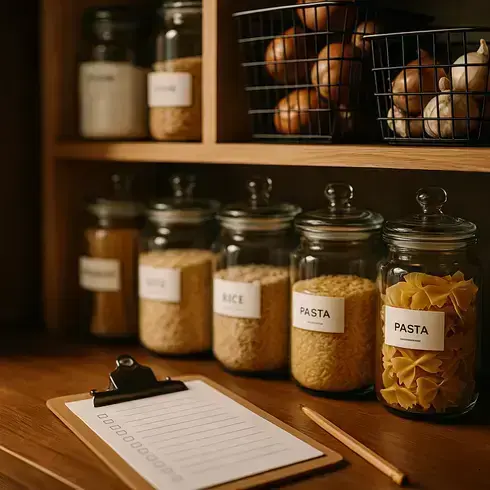
Labels That Teach The System
Labels should be loud, simple, and repeatable. Use category + item (“Pasta — Long”), date (“Opened 04/06”), and a par level (“Min 2”). The National Sanitation Foundation notes consistent labeling reduces cross-contamination and waste in pro kitchens—home pantries benefit the same way.
- Types: dissolvable for jars washed often, vinyl for bins, thermal labels for crisp text. Font size 18–24 pt for easy reads.
- Placement: front lower-right on bins; lid + side for canisters so you can spot contents from any angle.
What actually works might surprise you—the checklist that locks in sizes, par levels, and label rules is the quiet engine most homes skip…
Build A Pantry Organization Checklist Printable You’ll Actually Use
Your checklist shouldn’t be pretty first—it should be usable daily. Here’s the thing: a simple, visible sheet turns good intentions into habits you’ll keep.
So what belongs on the page? Think decisions you repeat every week—par levels, restock timing, and a quick FIFO scan—captured in one tight layout you can mark in seconds.
💡 Pro Tip: Print on cardstock and slide it into a sheet protector. Use a fine-tip dry-erase marker for quick updates. The USDA Economic Research Service notes that 30–40% of the U.S. food supply is wasted; a visible checklist cuts duplicates and missed use-by dates.
Core Sections Of The Printable
| Section | What To Fill | Update Frequency |
|---|---|---|
| Zones Map | Shelf labels by category (Breakfast, Dinner Base, Snacks) | When zones change |
| Inventory + Par Level | Item, On Hand, Par (min needed), Size | Weekly |
| Restock Tracker | Running list by store or delivery day | As you run low |
| Expiry Watch (FIFO) | Item + earliest date; move to front | Weekly sweep |
| Meal Plan Notes | 3–5 meals using what you own | Weekly |
| Rules & Labels Key | Label format, date dots, allergen notes | As needed |
In practice: Jamie sets pasta at par 2, rice at par 1, and notes “oils expiring first.” Midweek, one pasta left triggers a restock note—no last-minute runs, no third box hiding in backstock.
Want to build it fast? Gather a few basics first.
- Printer + cardstock or lamination pouch
- Sheet protector and dry-erase marker
- Small dot stickers for dates
- Magnetic clip or clipboard for the door
- Optional: QR sticker linking to a shared grocery note
- Pick size (Letter/A4) and format (grid with bold headers). Time: 10 minutes.
- List top 15–25 recurring items, then set par levels using your last 4 weeks of use.
- Add a two-column Restock area (Need / Store). Keep it short to force priority.
- Create an Expiry Watch row with three slots—oldest dates only. That’s your FIFO glance.
- Write your Labels Key (category + item + opened date). Make it the same across bins.
- Print, protect, and mount at eye level near the pantry handle.
- Every Sunday, do a 5-minute sweep: update On Hand, move oldest forward, and fill Restock.
Worth noting: if someone in your home has severe food allergies, consult a registered dietitian or board-certified allergist when defining zones and label rules.
And this is exactly where most people make the most common mistake—creating the checklist but skipping the physical setup that makes it work every day…
Step-By-Step Setup: Edit, Group, Decant, Label, And Arrange
This is where order becomes muscle memory—edit, group, decant, label, and arrange. Ready to lock it in? You’ll feel the difference at dinner time.
What’s the fastest path from chaos to flow? Follow a clear sequence and respect food safety rules so your system lasts longer than a weekend.
💡 Pro Tip: When decanting, slip a 2×4 inch cutout from the original package (ingredients, allergen statement, lot code) under the lid. The FDA’s Food Allergen Labeling guidance stresses clear allergen info—keep it with the food.
Supplies
- Timer, trash bag, donation box
- Clean canisters/bins, label maker or markers
- Dot stickers for dates, measuring scoop
- Microfiber cloth and mild cleaner
Time: 60–90 minutes for a standard pantry. Prerequisite: zones mapped and container sizes chosen.
- Edit fast: Set a 15-minute timer per shelf. Pull items, wipe surfaces, and remove anything expired or stale.
- Group with intent: Cluster by use: breakfast starters, dinner bases, sauces, snacks, baking. Ask, “What do I reach for together?” That’s your sub-cluster.
- Decant the right foods: Transfer dry, stable goods—flour, sugar, rice, oats, pasta—into airtight canisters. Skip chips and powdered sugar if humidity is high; original bags protect texture.
- Add dates and details: Mark “Opened” and “Best by.” Place oldest product in front. USDA FoodKeeper recommends first-in, first-out to cut waste and maintain quality.
- Label to teach behavior: Use category + item + size (e.g., “Pasta — Long — 2.5 qt”). For allergens, dedicate a sealed bin and a distinct color label to prevent mix-ups.
- Arrange by frequency and safety: Daily items at eye level, heavy/backstock low, kid snacks mid-shelf. Oils and vinegars on a turntable away from heat and light to slow oxidation.
- Set visual par levels: Place a simple “Min” line inside bins or note “Par 2” on labels. When you hit the line, add to the restock list.
- Create a landing zone: Reserve one bin for “open bags/awkward sizes.” Empty it weekly so strays don’t spread.
In practice: Sam tackled one shelf at a time, decanted only flour, sugar, and rice, and labeled snacks by portion. The whole setup took 70 minutes—and weeknights stopped feeling like a scavenger hunt.
And this is exactly where most people make the most common mistake—skipping the tiny daily reset that keeps everything tidy without effort…
Maintenance Made Easy: Five-Minute Resets, Restock Rituals, And Hacks
Maintenance isn’t a marathon—it’s a tiny loop you repeat. Two minutes here, three there. The result feels effortless because the rhythm does the work.
Worried you’ll slide back into chaos? Here’s the thing: small, fixed touchpoints protect freshness, trim food waste, and stop duplicate buys. USDA FoodKeeper guidance shows consistent rotation extends shelf quality; pair that with simple par levels and you’ll avoid last-minute runs.
💡 Pro Tip: Create a small “inbound” bin for new groceries. Nothing joins a zone until it’s dated, decanted (if needed), and logged against your par level—this single gate keeps the whole system honest.
Five-Minute Reset (Daily)
In practice: picture this scenario—after dinner, you set a 5-minute timer. You face labels, push oldest forward, and toss empty boxes. It’s boring in the best way—like brushing your teeth.
- Scan eye-level shelves; return any wanderers to their zones. If a bin hits its “Min” line, add it to Restock.
- FIFO in 20 seconds: pull forward the earliest dates on snacks, cans, and grains.
- Check the lazy Susan: wipe drips, tighten caps, and keep oils away from heat.
- Consolidate partials (same brand, same lot if possible) to free space and reduce stales.
- Do a micro-trash pass—wrappers, stale crackers, mystery packets—gone.
Restock Rituals That Prevent Overbuying
The truth is, overbuying hides in habits, not carts. A short, predictable schedule beats impulse coupons every time.
| Day | Trigger | Action |
|---|---|---|
| Sunday | Meal plan ready | Cross-check recipes vs. On Hand; add gaps to Restock |
| Wednesday | Par-level dip | Top 5 items only; avoid full shop |
| Month-End | Two low-use bins | Freeze, donate, or feature in next week’s meals |
| Quarterly | Seasonal swap | Deep wipe, check seals, review expiry dates and FDA recall notices |
Tiny Hacks That Compound
- Use date dots on lids and fronts—front for speed, lid for accuracy.
- Set “par 2” on high-turn items (pasta, cereal); “par 1” for bulk staples (rice, oil).
- Mark a cost-per-use on premium goods; it curbs random splurges.
- Keep a grocery tote in the pantry for returns and bottle recycling.
- Reserve the top shelf for low-frequency categories so dailies stay frictionless.
And honestly? Five calm minutes beat one chaotic hour. Once this is in place, the rest of the routine falls into place naturally.
Your Pantry System Is Ready
You’ve got the pillars: audit and set real-life zones, choose containers/turntables/labels that truly fit, and run everything through a simple checklist with FIFO and par levels. If you take just one thing from this guide, let it be: a visible pantry organization checklist printable on the door turns good intentions into daily habits that stick.
Before, shelves felt confusing—duplicates, expired cans, and dinner delays. Now, zones guide every grab. Labels teach the family the rules. Five-minute resets keep it tight. Less waste, faster meals, calmer evenings. It won’t be perfect every day—but it’ll be predictable, and that’s the win.
Which move are you trying first—zone audit, container sizing and labels, or the five-minute reset? Tell us in the comments!

About the Author:
Claire Anne Foster is a home organization enthusiast, lifestyle writer, and the founder of this blog — built for people who want a cleaner, calmer home without spending every weekend doing it.
After years of testing every organization system, planner, and cleaning routine she could find, Claire realized that most advice was either too complicated to maintain or too generic to be useful. So she started creating her own — simple, printable, and designed for real life with real schedules.
Claire is not a professional organizer or interior designer — just someone who genuinely loves a well-organized home and believes that the right checklist or routine can change how your entire week feels. Every resource on this site is practical, tested, and designed to be used — not just pinned and forgotten.
When she’s not writing or reorganizing her pantry for the third time, Claire is testing new meal planning systems, exploring better morning routines, and convincing her family that yes, everything does need a labeled bin.