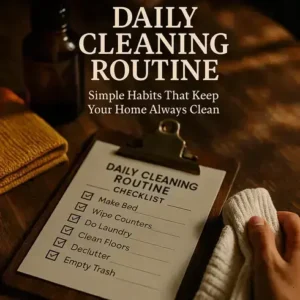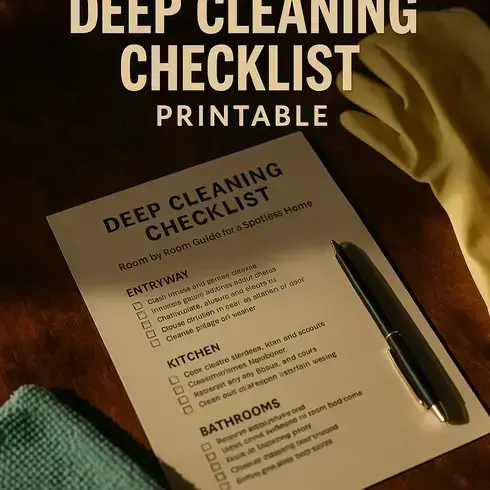
Picture this: you start scrubbing the sink, then notice the baseboards, then the oven—forty minutes gone, and the room still looks tired. A deep cleaning checklist printable on the fridge would keep you on track, step by step. No guesswork, no backtracking.
The truth is, most of us clean out of order. We redo work, miss hidden grime, and spend extra on sprays we don’t need. That chaos steals your weekend and your mood—dust triggers sniffles, sticky floors invite ants, and clutter keeps piling up.
Here’s the plan: a clear room-by-room guide, pro tips, and realistic time blocks, plus a deep cleaning checklist printable you can use right away. You’ll know what to do, what to skip, and when to call it done. Ready to set up your supplies and start strong?
What To Prep First: Supplies, Safety, And Stain Tests
Before the first swipe, set the stage. The right prep saves time and prevents damage—especially on stone, wood, and delicate fabrics. Think safety, then supplies, then stain tests.
Here’s the thing: harsh products work fast, but only when used right. Ventilate well, wear PPE, and check labels for dwell time (the contact time needed to work), as the EPA recommends.
- HEPA vacuum, microfiber cloths, and non-scratch scrubbing pads
- pH-neutral floor cleaner, enzyme cleaner, and 3% hydrogen peroxide
- Oxygen bleach (color-safe), isopropyl alcohol (70%), dish soap
- Nitrile gloves, eye protection, and a simple N95/NIOSH respirator for dusty jobs
- White cotton swabs, stopwatch, painter’s tape, and a small bowl for patch tests
💡 Pro Tip: Decant concentrates into labeled spray bottles and note dilution ratios plus the product’s Safety Data Sheet (SDS) number. According to the American Cleaning Institute, correct dilution prevents residue, streaks, and surface etching.
| Cleaner | Best For | Patch Test Rule |
|---|---|---|
| 3% Hydrogen Peroxide | Grout brightening, mildew stains | Dot on hidden spot; check for lightening after 10–15 min |
| Oxygen Bleach (Sodium Percarbonate) | Whites, color-safe laundry, outdoor fabrics | Mix fresh; test seam allowance for colorfastness |
| Enzyme Cleaner | Protein or fat stains (food, pet) | Apply, cover, allow full dwell time; inspect fiber texture |
| pH-Neutral Cleaner | Sealed wood, stone, and tile floors | Wipe on a small area; confirm no dulling or film |
In practice: picture this scenario—red wine on a wool rug. You’re tempted to soak it. Instead, you blot, then test enzyme vs. peroxide on the rug’s underside. Ten minutes later, enzyme wins, no color bleed.
- Suit up and ventilate: open windows, switch on exhaust fans (2–3 minutes).
- Stage a supply caddy per floor to avoid backtracking (5 minutes).
- Identify “no-go” surfaces: unfinished wood, unsealed stone, silk (1 minute).
- Run patch tests: tape off a 1-inch square, apply cleaner with a swab, and time dwell per label (10–15 minutes).
- Check results under good light—look for color shift, haze, or softening (2 minutes).
- Finalize your lineup: circle winners on your printable and note dwell times (2 minutes).
Worth noting: for suspected mold over 10 square feet or any surface that may contain lead paint, follow EPA guidance and consult a certified professional.
And this is exactly where most people make the most common mistake—starting the kitchen without a tested degreaser that won’t haze glass or dull cabinets…
Kitchen Deep Clean: Appliances, Cabinets, And Grease Zones
Grease spreads like glitter. You wipe one spot—and it reappears somewhere else. The fix isn’t harder scrubbing; it’s a smart kitchen sequence.
Here’s the thing: appliances hold different soils. Polymerized oil on ranges needs alkaline action, while stainless steel prefers mild surfactants. The U.S. Department of Energy notes clean refrigerator coils improve efficiency, and the USDA recommends 40°F or below for food safety—so we’ll reset performance while we clean.
Targeting Grease Hotspots
| Zone | Best Method | Dwell / No-Go |
|---|---|---|
| Range Hood Filters | Soak in 140°F water + alkaline degreaser; rinse hot | 10–15 min; avoid caustic on bare aluminum |
| Oven Interior | Gel cleaner on warm (not hot) surface; plastic scraper | 20–30 min; follow manufacturer guidance |
| Stainless Steel | Dish soap + microfiber with the grain | No bleach; no abrasive pads |
| Painted Cabinets | Diluted, solvent-free degreaser; soft cloth | 2–3 min; patch test for sheen change |
⚠️ Important Warning: Never mix bleach and ammonia or acid cleaners—fumes can be dangerous. The CDC reports chloramine and chlorine gas can cause breathing problems even at low exposure.
Quick Sequence That Actually Works
- Remove parts: oven racks, stovetop grates, and hood filters. Soak grates/filters in hot water with degreaser (10–15 minutes).
- Pre-treat grease lines on backsplash, cabinet pulls, and vent trim. Let the cleaner sit—dwell time does the heavy lifting.
- Warm the oven to 150°F, turn it off, then apply gel cleaner. Scrape softened carbon with a plastic scraper.
- Microwave: steam a bowl of water with lemon for 3 minutes; wipe splatter while surfaces are warm.
- Dishwasher: clean filter, run a hot cycle with a dishwasher cleaner or citric acid. NSF sanitizing cycles help reduce bacteria when available.
- Refrigerator: set to 37–40°F, empty shelves, wash gaskets with mild soap, and vacuum coils with a brush attachment.
- Finish with stainless steel and cabinets—light pressure, fresh cloths, and dry buff for a streak-free sheen.
In practice: picture this scenario—you pull a sticky baffle filter and dread the scrub. Into a sink of near-boiling water plus degreaser it goes. By the time the oven gel finishes dwelling, grease floats off the filter with a quick rinse. Ten minutes saved, arms spared.
Worth noting: if you suspect damaged wiring or gas leaks around the range, pause and contact a licensed technician before proceeding.
And this is exactly where most people make the most common mistake—skipping the next high-germ zone that hides grime in plain sight…
Bathroom Deep Clean: Grout, Glass, And Germ Hotspots
Soap scum hides everywhere. Grout drinks it in, glass shows it off, and fixtures spread it. The win isn’t stronger chemicals—it’s heat, dwell, and gentle mechanics.
Here’s the thing: you clean first, then you disinfect. The CDC advises routine disinfection of high‑touch points, but only after soil is removed. For illness cleanup, choose an EPA List N disinfectant and respect the label’s contact time—usually 5 to 10 minutes.
| Surface/Grout Type | Safer Cleaner | Aftercare / Notes |
|---|---|---|
| Sanded (Cement) Grout | Alkaline cleaner (pH 8–10); oxygen bleach paste on stains | Let dry 24–48 hrs, then reseal; avoid strong acids |
| Unsanded (Cement) Grout | Mild alkaline + soft nylon brush | Use light pressure; reseal; skip metal brushes |
| Epoxy Grout | Neutral or slightly alkaline surfactant; degreaser for film | No sealer needed; avoid harsh oxidizers |
| Silicone Caulk Lines | 3% hydrogen peroxide or mildew remover | Dry fully; replace if staining returns |
Glass loves warm prep. Steam the shower for three minutes, mist a gentle alkaline cleaner, wait, then squeegee top to bottom. Stubborn spots? Use a plastic razor at a shallow angle and finish with a dry microfiber for that showroom sheen.
💡 Pro Tip: Protect after you perfect. Apply a hydrophobic glass coating and a penetrating grout sealer once everything is bone-dry. The Natural Stone Institute recommends pH‑neutral care on stone and sealed grout to prevent etching and haze.
In practice: picture this scenario—you flip the fan on, run hot water, and spray while the tile is warm. Ten minutes later, a nylon brush lifts dingy grout lines without grinding the surface. A quick rinse, squeegee, and towel buff, and the glass looks brand new.
Germ hotspots need a plan. Hit faucet handles, shower controls, the flush lever, toilet seat hinges, and toothbrush holders after cleaning. Use an EPA List N disinfectant, re-wet if it dries early, and allow full contact time—no rushing the clock.
Worth noting: acidic descalers cut limescale fast, but keep them off marble, limestone, or travertine; stick to pH‑neutral formulas on natural stone to avoid permanent etching.
And this is exactly where most people make the most common mistake—ignoring the fabric and dust traps waiting in the next room…
Bedrooms And Living Areas: Dust, Fabrics, And Hidden Surfaces
Dust always comes back faster than you think. Bedrooms and living areas collect fibers, skin cells, pollen, and pet dander—tiny stuff that rides air currents and settles in layers.
Here’s the thing: a top‑to‑bottom flow saves hours. Start high (fans, crown molding), move mid (bookcases, frames), and finish low (sofas, baseboards, under furniture). The Asthma and Allergy Foundation of America notes that HEPA filtration and frequent bedding care reduce allergen load significantly.
| Tool | Best For | Watch Outs |
|---|---|---|
| HEPA Vacuum (sealed) | Mattresses, sofas, carpets, baseboards | Slow passes; avoid beater bar on delicate rugs |
| Microfiber Cloth | Shelves, frames, screens, lamps | No fabric softener (kills static grip) |
| Electrostatic Duster | Ceiling fans, blinds, vents | Trap dust first, then vacuum floor |
Fabrics matter. Wash sheets weekly in hot water (around 130°F), rotate pillows to the dryer on high heat 10–15 minutes, and vacuum mattresses with a crevice tool. Add encasements if allergies flare.
- Lift and vacuum under sofas and beds—use a flat wand for edges.
- Dust behind TVs and game consoles; heat pulls dust like a magnet.
- Clean blades of ceiling fans, then the ceiling line to catch fall‑off.
- Vacuum drapes with a soft brush; check care tags before laundering.
- Wipe HVAC returns and replace filters (aim for MERV 11–13 where compatible).
💡 Pro Tip: Light first, then fabric. Dust lampshades with a dry microfiber or lint roller before you vacuum upholstery—otherwise the shade sheds crumbs onto newly cleaned cushions. The EPA notes indoor dust carries metals and allergens, so capture it with HEPA, not just a feather pass.
Picture this scenario: you slide the sectional two feet, and a stripe of gray appears along the wall and baseboard. A slow HEPA pass along the edge, a damp microfiber wipe on the trim, and a quick leg polish make the whole room feel newer—without moving every piece of furniture.
Worth noting: motorized brush heads lift hair fast but can fuzz delicate weaves; switch to a plain suction nozzle on linen or silk blends.
But there’s one detail most owners completely overlook until it’s too late—the simple printable that locks this room flow into a weekly-and-monthly rhythm you’ll actually follow…
Printable Room-By-Room Checklist: Timelines, Rotations, And Quick Wins
Your brain loves structure. A well‑built printable turns scattered chores into a clear route—so you stop redoing steps and start finishing rooms with confidence.
Here’s the thing: timelines beat motivation. Set weekly, monthly, and seasonal rotations, then check them off. The American Cleaning Institute notes that written routines reduce rework and improve product safety when you record dilutions and dwell times.
| Frequency | Rooms / Tasks | Time Target |
|---|---|---|
| Weekly | Kitchen splash zones, bathroom fixtures + glass, sheets + pillowcases | 45–75 min total |
| Monthly | Baseboards, blinds, ceiling fans, fridge gasket + coil vacuum | 60–90 min |
| Seasonal | Carpet extraction, window tracks, grout sealing, mattress rotation | 2–3 hrs |
How To Use Your Printable
- Room blocks with checkboxes: list 5–7 high‑impact tasks per space—no fluff.
- Time columns: estimate minutes and record actuals to tighten your pace.
- Dwell tracker: space to note cleaner contact time for ovens, grout, and degreasers.
- Rotation strip: mark W (weekly), M (monthly), S (seasonal) so tasks don’t drift.
- Products + patch tests: jot dilution ratios, surfaces, and the hidden test spot used.
- Assignments: initials for who does what—keeps family or roommates aligned.
- Parking spot: clip to a caddy or magnet it on the fridge for quick grabs.
💡 Pro Tip: Batch by dwell time. Start any long‑soak task (oven gel, grout brightener), set a timer on your phone, and jump to fast wins like handles and light switches while chemistry works.
In practice: you hit the kitchen first, ticking off “filters soaking” and “oven gel applied,” then slide to bathrooms for glass and fixtures while the timer runs. When it dings, you scrape, rinse, and move to living areas—no idle minutes, no guesswork.
Worth noting: label cleaners on your printable exactly as stored, and keep incompatible products apart; this mirrors ACI guidance for safer home care.
Print two copies—one master, one for the caddy. Update times after the first run. With your deep cleaning checklist printable dialed to your home, you’ll work faster and finish cleaner. Once this is in place, the rest of the routine falls into place naturally.
Your Deep Clean, Simplified
You’ve got the flow: prep safely and patch-test first, work room by room (kitchen grease zones, bathroom grout and glass, bedrooms and living dust traps), then lock it in with timelines. If you take just one thing from this guide, let it be: sequence and dwell time beat brute force. Your deep cleaning checklist printable keeps you moving, prevents damage, and makes results repeatable.
Before, cleaning felt random and endless — you bounced between tasks, re-wiped, and still missed hidden grime. Now it’s clear and calm. You start high, batch by dwell time, and finish each space with confidence. Less scrubbing. More finish lines. A healthier home that actually stays that way.
Which room are you tackling first with your printable — kitchen grease, bathroom grout, or the dust-heavy living room? Share your plan in the comments; we’re cheering you on.

About the Author:
Claire Anne Foster is a home organization enthusiast, lifestyle writer, and the founder of this blog — built for people who want a cleaner, calmer home without spending every weekend doing it.
After years of testing every organization system, planner, and cleaning routine she could find, Claire realized that most advice was either too complicated to maintain or too generic to be useful. So she started creating her own — simple, printable, and designed for real life with real schedules.
Claire is not a professional organizer or interior designer — just someone who genuinely loves a well-organized home and believes that the right checklist or routine can change how your entire week feels. Every resource on this site is practical, tested, and designed to be used — not just pinned and forgotten.
When she’s not writing or reorganizing her pantry for the third time, Claire is testing new meal planning systems, exploring better morning routines, and convincing her family that yes, everything does need a labeled bin.